I will warn you right now. This project is not for the faint of heart. The finished product is inconceivably fabulous, but I don't even want to know how many hours I spent hovered over this venture. Needless to say, it didn't arrive quite in time for Megan's birthday candles to be blown out, but I DID finish and she DID finally receive it. This is positive, and we like to think of the positive.
Anywho, now for the fun part. I tried to document the process as thoroughly as possible. Forgive me for the photography. I had three lessons on how to use Ben's fancy pants camera, and zoned out through what I am sure was important information during all of them. I miss my digital point and shoot!
Step one: Gather supplies.
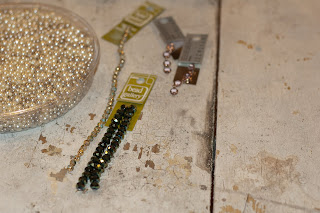
You can use old unwanted jewelry if you choose (reduce, re-use recycle!) or buy beads at your local craft store. I realized that I sold all of my "teen" jewelry in the garage sale Ben and I had last summer to help fund our honeymoon. Side-note: This is why I'm a hoarder. Eventually, I can find a use for any of my old junk. Kind of. Maybe. I'd like to think that anyway. However, with no old jewelry to sacrifice, off to Michael's I went with my wonderfully patient friend Mandie to buy beads. I title her wonderfully patient because she proceeded to walk up and down the 2 aisle of beads with me for at least an hour. This is what I ended up with:
faux pearls, green sparklies, pink gems and a stain-glass like round bead
Step two: Create the neck band.
Originally, I had planned on using some thick ribbon I thought I had. I got home and realized that I had about 2 inches left of the aforementioned ribbon. I decided to make straps out of some silky taupe fabric I had in my possession.
I cut the fabric to about 2 1/2 inches using my handy dandy rotary cutter and self healing mat.
I then folded the fabric inside out and pinned it to keep it in its proper place.
Finally, I stitched down the frayed edge and turned it inside out like you would do if you were making a pillow so the sewn edges don't show.
Lather, rinse, repeat for the other strap.
Step three: Cut your mesh and attach your straps.
I cut two pieces of mesh into identical crescent moons for the base of the necklace. I then sewed the straps in between the pieces of mesh for stability.
Side-note: If you want to put a backing on your necklace to hide all the ugly threads, like I did, I recommend cutting that fabric now to the shape of your mesh, like I did not. It will save you some trouble and guesstimation frustration in the end.
My straps were wrinkly. Perfect excuse to whip out my midget iron.
It doesn't look like these match in shape and size here, but they do. I used the old kindergarten trick of folding and cutting in order to get symmetrical moons. You know, like you used to do to make hearts for your Valentines cards.
I sewed one end of each strap into a triangle to blend better with the mesh.
Necklace skeleton complete!
Step Four: The tedious task of beading.
This is the part that will take you the longest amount of time, but it is so worth it in the end. My pearls were 3 different sizes and 2 different colors (ivory and taupe), so I sewed them on as a smorgasbord intermittently incorporating the other beads. Voilá, you have yourself a necklace that says, "yes, I am awesome," unveiled from your very own blood, sweat and tears. Literally. Blood. Sweat. Tears. It's the only way to make it worthwhile... right?
I also sewed little pearls on the end of each strap so when it's tied, it dangles pretty.
Step five: Apply backing.
Once you're done sewing all those little beads, the back will look something like this:
eww, yuck, gross.
I simply selected a fun piece of scrap fabric and hot glued it to the back. My initial thought was to sew it on, but my oh so wise mother saw the tears a brewing and recommended the much easier and just as good alternative of glue.
So there ya have it. A tremendous task to keep you busy for a while with a jaw-dropping outcome. Probably one of my favorite gifts I have given in a long time.
Wrapped and ready to go!
It only suits that Megan be the model for the finished product. Plus, it looks great with just a plain white tee like she just so happened to be donning the night she received it. I just love her dearly! Isn't she beautiful?!
Special thanks to Caitlin for the inspiration!


This is lovely. I"m going to attempt. Been thinking about trying it for some time. Happy Blogging fellow blogger :)
ReplyDelete