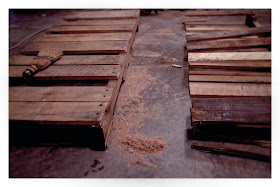
First things first, gather your supplies. Here's what you'll need:
- 3 Large Pallets - I work for a business that sells copiers, so I was able to get my pallets for free. If you don't have access to any, click here for advice on where you can find them for free or for cheap.
- 8 L Shaped Brackets
- 4 Caster Wheels - I used these swivel casters because not only does it add to the look, but makes it easy to move.
- 48 Screws
- Sandpaper Block
- Stain or Paint of your Choice - I used this stain because I wanted it to be stark and masculine.
- Polyurethane - I used this one with a satin finish because I didn't want it to be high gloss.
- Circular Saw
- Drill
- Screw Driver
- Goggles
Step 1: Cut your pallets
Cut all 3 pallets in half lengthwise (like a hot dog in elementary school language) using your circular saw. On each pallet, there should be 3 long pieces of wood going across the back. When cutting, cut behind one side of long pieces of wood so you have a solid, rectangular form.
Step 2: Cut one pallet in half
Cut one of your rectangular pieces in half width-wise (like a hamburger) using your circular saw. These 2 pieces will act as the "legs" of your entertainment center.
Step 3: Sand the pallets
Pallets tend to be a little rough around the edges, including the edges you just cut. Use an electric sander if you're lucky enough to have one, to smooth out those nasty little splinters. A sanding block will work fine as well, it just takes a little longer and you can totally count it as your exercise for the day. I did.
Step 4: Assemble
Start assembly by setting out the plank you designated to be the bottom and setting the 2 sides on either side of it, slat side out. You will be using your L Brackets to hold these pieces together. Start by tracing through the holes of the brackets with a sharpie (or other writing utensil that you will be able to see). Use your drill to prep the area for your screws by drilling small holes in the spots you marked. I put the emphasis on small because if the holes are too big, your screws won't hold strong. Place Brackets over the prepped holes and use a screw driver to screw them into place.
Once you finished with the bottom, flip it over and repeat the same process with the top. Just make sure that all your pieces are facing the right direction.
Step 5: Add a 2 planks on the ends to eliminate the big holes left by attaching the sides. You don't HAVE to do this step, but I think it looks more finished this way. Use nails to keep these in place.
Step 6: Add Casters
Once the form is finished and all the brackets are secure, flip it (carefully) onto it's top. Use the casters to determine where the screws will be going and mark them with your sharpie. Drill holes for the screws in the spots you have marked. Place casters over the holes and screw in your screws. Once you have all 4 wheels on, flip the unit back over being careful not to put too much weight on the sides of the wheels.
You now have a rolley polley ollie entertainment center!
Step 7: Stain or Paint
To polish off your unit, use a stain or paint of your choice that fits your decor. Follow the instructions on the can to achieve the perfect finish. Once your stain or paint has dried, coat it with polyurethane to seal it.
Voila! Step back and admire your hard work. You done did good.
Do you already have an entertainment center? This piece could have many personalities. It could also be extra kitchen storage, a bar, a display area, a bookshelf (if you fill in the gaps or lay a plank across the cracks) or perhaps an entryway table. The sky is the limit, so don't limit yourself!
Do you love look but don't like the idea of making it yourself? I'll make one for you! Contact me about pricing.


No comments:
Post a Comment